SRJ Piping India company logo – leaders in fire protection, industrial piping, and heavy structural fabrication solutions

Mandrel Pipe Bending: Your Step-by-Step How-To Guide

Table of Contents

Pipe bending, essential for various applications from plumbing to industrial frameworks, requires precision to avoid kinks, wrinkles, or deformation. Many find the diverse methods and terminology, like mandrel or rotary draw bending, overwhelming. Errors can compromise structural integrity, impede flow, and lead to costly waste.

This guide aims to simplify the process of pipe bending. It will cover various techniques, tool selection, and standard defect troubleshooting, empowering you to achieve smooth, accurate bends with confidence.

Step-by-Step Guide to Mandrel Pipe Bending

Achieving a perfect bend involves a sequence of actions, regardless of the specific method you choose. Follow these steps to plan, execute, and verify your pipe bending projects.

A close-up shows a large industrial machine with a glowing, red-hot metal pipe being processed, likely undergoing a heating or forming operation.

Understand the Basics & Choose Your Method

Before you make a single mark or choose a machine, you need to grasp the fundamentals of how different bending methods work and determine which one is best suited for your specific project requirements, material, and budget. This is the foundation of successful pipe forming.

What to do:

Educate Yourself on Common Methods. Get familiar with the primary pipe bending techniques:

  • Rotary Draw Bending: Often considered the gold standard for precision bends, especially tight radii.
  • Compression Bending: A more straightforward method where the pipe is held stationary at one end while a bend die (or “shoe”) rotates, pushing the pipe against a fixed counter-die.
  • Roll Bending: Used for creating large-radius curves or sweeping arcs. The pipe passes through a series of adjustable rollers (typically three).
  • Heat Induction Bending: Used primarily for large-diameter pipes with gradual bends. The pipe is heated locally by an induction coil as it’s slowly pushed through a bending arm.
  • Manual Bending: Using hand tools like conduit benders or simple lever-type benders. 
  • Spring Bending: Using a flexible spring inserted inside or wrapped around the pipe to prevent kinking during bending.
  • Sand Packing / Low Melting Alloy: Historical or niche methods where the pipe is filled with sand or a low-melting point alloy for internal support before bending.

Why it matters: 

Choosing the wrong method can result in immediate defects, such as kinking, wrinkling, or excessive ovality. Trying to force a technique on a pipe it’s not suited for is a recipe for failure and scrap material.

Select the Right Pipe Material and Size

The pipe itself is a critical component in the bending process. Its material composition, size (outer diameter), and wall thickness dictate its bendability and how it will behave under stress. Understanding these factors is fundamental to successful pipe bending.

What to do:

  • Verify Material Type and Grade: Confirm the exact alloy or material specification to ensure accuracy and precision.
  • Measure Outer Diameter (OD): Use a caliper or micrometer to accurately confirm the pipe’s outer diameter. 
  • Measure Wall Thickness: Wall thickness is often the most critical factor influencing bendability and susceptibility to defects. 
  • Research Material Bendability: Consult material property charts or contact material suppliers to understand the typical bend radius limitations and bending characteristics for your specific pipe material and size. 
  • Consider Surface Finish: Surface treatments or coatings can impact friction during bending, potentially necessitating the use of different lubricants or tooling.

Why it matters: 

A material with low elongation might crack when bent too sharply. A thin-walled pipe bent without a mandrel or internal support will likely collapse or experience severe ovality, especially on tight radii. Ignoring these factors leads to unavoidable pipe-bending defects.

Choose the Appropriate Tooling and Equipment

Once you know your desired bend, your material, and the best method, it’s time to select the specific tools and machinery. The proper tooling is crucial for achieving precise, defect-free bends, particularly for techniques such as rotary draw pipe bending and mandrel pipe bending.

What to do:

Most bending methods use various dies:

  • Bend Die: Determines the radius of the bend. Its groove must match the pipe’s outer diameter (OD) precisely.
  • Clamp Die: Secures the pipe in place at the start of the bend to prevent slippage. Must match the pipe’s OD.
  • Pressure Die: Applies force against the pipe on the outside of the bend to push it along the bend die. Must match the pipe’s OD.
  • Wiper Die: Used in mandrel pipe bending to prevent wrinkles from forming on the inside radius (intrados) of the bend, especially with thin walls or tight radii. It fits snugly against the bend die and the pipe.
  • Determine Mandrel Need (If Using Rotary Draw): For tighter bends or thinner walls, an internal mandrel is essential for supporting the pipe’s inner wall and preventing collapse (pipe deformation).
  • Ensure Tooling Compatibility: All dies, mandrels, and the machine must be compatible with the pipe’s exact outer diameter (OD) and the desired bend radius. Tooling from different manufacturers may not be interchangeable.
  • Check Tooling Condition: Inspect dies and mandrels for wear, damage, or scoring. Worn tooling can cause bend marks and wrinkles, as well as inaccurate bends.

Why it matters:

Using worn tooling can cause friction, leading to galling or surface defects. Incorrectly sized dies will cause ovality or fail to form the bend correctly. Missing a required mandrel will result in pipe collapse. Precision tooling ensures the bending forces are applied correctly and supported adequately.

Prepare the Pipe and Set Up the Equipment

With the correct method, pipe, and tooling selected, the next crucial step is to prepare the pipe and set up your chosen bending equipment correctly. Accuracy and attention to detail are essential in preventing errors during the bending process.

What to do:

  • Cut Pipe to Length: Cut the pipe slightly longer than the final required length to account for material consumed in the bend and potential trimming after bending. 
  • Clean the Pipe: Ensure the inside and outside surfaces of the pipe are clean and free of debris, oil, or rust that could interfere with tooling or lubrication.
  • Mark the Pipe: Accurately mark the pipe to indicate the start of the bend (often referred to as the tangent point or ‘line of bend’ on the bend die) and potentially other reference points for angle verification. 
  • Install Tooling: Carefully install the selected dies (bend, clamp, pressure, wiper) and the mandrel (if used) onto the bending machine according to the manufacturer’s instructions. 

Why it matters: 

Misaligning the pipe or tooling can cause the bend to start in the wrong place or apply uneven pressure, leading to kinks or inaccurate angles. Improper lubrication increases friction, which can cause cracking or galling. Incorrect machine settings on a CNC will result in repeatable, but wrong, bends.

Execute the Bend Safely and Accurately

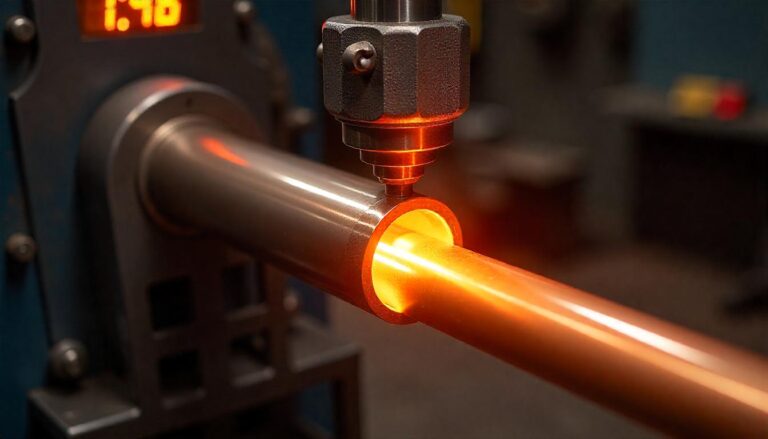
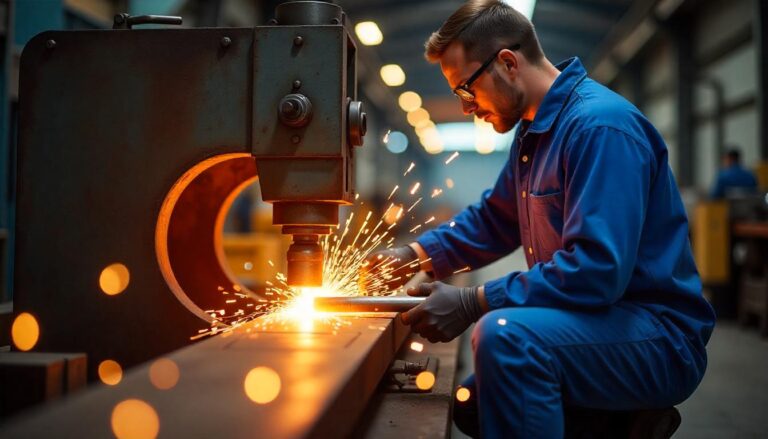
This is where the actual bending happens. Applying the correct procedure and paying attention to the process are key to achieving a high-quality bend while ensuring safety.

What to do:

  • Load the Pipe: Carefully load the prepared and marked pipe into the bending machine, aligning the mark with the designated tangent point on the bend die. 
  • Engage Clamping and Pressure: Activate the clamp die to securely hold the pipe in place. 
  • Position Mandrel and Wiper Die (If Used): Advance the mandrel so its nose is positioned correctly relative to the bend tangent point (specific position depends on material, radius, and tooling). 
  • Monitor the Process: As the pipe bends, watch for any signs of distress, such as unusual noises (groaning, cracking), visual cues (uneven bending, sudden bulges, pipe deformation), or excessive machine strain.
  • Control Bend Angle: Monitor the bend angle as it progresses using the machine’s indicator or an external protractor. 

Why it matters: 

Improper execution leads directly to pipe bending defects such as kinks (sudden collapse, usually on the inside radius), wrinkles (buckling on the inside radius), ovality (the cross-section deforms from round to oval), cracking (especially on the outside radius if the material is stretched too thin or has low elongation), or inaccurate bend angles/radii.

Inspect the Bend for Quality and Defects

After the bend is complete, a thorough inspection is mandatory. This step confirms whether the bend meets the required specifications and identifies any pipe-bending defects that may have occurred during the process.

What to do:

  • Visual Inspection: Examine the entire bend area for obvious defects:
  1. Kinks: Sharp creases or collapses.
  2. Wrinkles: Undulating lines on the inside radius (bend marks and wrinkles).
  3. Cracks: Tears in the material, usually on the outside radius.
  4. Galling/Scoring: Scratches or material transfer from the tooling.
  5. Surface Irregularities: Dents, bulges, or uneven surfaces.
  • Measure Bend Angle: Use a protractor, angle finder, or the bending machine’s angle encoder to verify the final bend angle against the specification, taking into account springback.
  • Measure Bend Radius: Use a template or radius gauge to confirm that the actual radius matches the design, especially for tight-radius pipe bending.
  • Check for Ovality: Measure the pipe’s outer diameter across the bend in different orientations (major and minor axes) and compare it to the original outer diameter (OD). 
  • Assess Wall Thinning: Measure the wall thickness on the outside radius of the bend. Bending stretches the material on the outside, causing it to thin. 
  • Check Overall Dimensions: Verify the location of the bend along the pipe and the length of straight sections using tape measures or coordinate measuring machines (CMM) for complex parts.
  • Document Findings: Record the results of your inspection, noting any deviations or defects that were observed.

Why it matters: 

Failing to identify pipe-bending defects can result in the installation of a pipe that is weakened. Excessive wall thinning can lead to rupture under pressure. Excessive ovality reduces flow capacity and structural strength. Wrinkles can be stress risers or trap debris.

Post-Bending Processes (Optional but Recommended)

Depending on the material, application, and prior bending method (especially hot pipe bending), post-bending processes may be necessary to restore material properties, enhance the appearance, or prepare the pipe for subsequent steps, such as welding or finishing.

What to do:

  • Cleaning: Remove any residual lubricant, marks, or debris from the bent pipe.
  • Deburring: Clean the inside of the pipe end again after cutting to final length to ensure no burrs remain that could impede flow.
  • Heat Treatment: For certain materials (e.g., some stainless steels or alloys) that are bent using hot pipe bending or where significant cold working occurs during bending, heat treatment (such as annealing or stress relieving) may be required to restore mechanical properties, relieve internal stresses, and prevent issues like stress corrosion cracking. This is particularly important for critical applications.
  • Finishing: Apply desired surface finishes such as polishing, painting, powder coating, or plating.
  • Trimming/Machining: Cut the pipe to its final required length or machine the ends for specific joint types.
  • Non-Destructive Testing (NDT): For critical bends (e.g., in aerospace, nuclear, or high-pressure systems), NDT methods such as dye penetrant testing, magnetic particle testing, or ultrasonic testing may be employed to detect invisible cracks or internal flaws.

Why it matters: 

Skipping the necessary heat treatment could leave the pipe susceptible to cracking or failure under stress. Poor cleaning or finishing can affect the pipe’s appearance or compatibility with subsequent processes.

A focused male worker in blue overalls and safety glasses operates heavy machinery, generating a shower of bright orange sparks as he works on a metal component in an industrial setting.

Conclusion

Pipe bending, from manual pipe bending to advanced CNC pipe bending, is a blend of art and science. While challenges like avoiding pipe deformation and ensuring a smooth bend technique can seem daunting, following a structured approach, understanding the role of each component (mandrel, dies, machine), and recognizing common issues can dramatically improve your results. You’ve now got a solid roadmap to tackle your pipe forming needs with confidence.

Begin your initial assessment today by reviewing your project blueprints and material specifications. Need expert assistance with complex bends, tooling selection, or optimizing your pipe bending process? Contact our experts.
Mastering mandrel bending is essential for achieving precision bends without compromising structural integrity in industrial piping. For specialized applications, explore our guide on Custom Fabrication Solutions and learn about Steel Fabrication Techniques that complement bending processes. Externally, AS Bending’s Essential Guide to Tube Bending Mandrels details tool selection, while CMRP’s tutorial on Mandrel Bending for Complex Sections offers advanced troubleshooting. Always prioritize tool calibration and material-specific settings to prevent kinking and ensure flawless bends.


Need Help with Mandrel or Precision Pipe Bending?

SRJ Piping India provides expert guidance on selecting the right tools, techniques, and materials to ensure flawless, defect-free bends for your industrial piping projects.