SRJ Piping India company logo – leaders in fire protection, industrial piping, and heavy structural fabrication solutions

Best Practices for Pipe Fabrication in High-Pressure Systems

Table of Contents

Building high-pressure piping systems for industrial facilities is a complex, critical task with severe consequences if overlooked. Failures can be catastrophic, leading to environmental damage, property loss, and fatalities. Ensuring the integrity, reliability, and safety of these systems demands meticulous planning, expert execution, and stringent quality control, along with a deep understanding of materials, engineering, and welding.

This guide will demystify high-pressure pipe fabrication, outlining key stages from design and material selection to welding, inspection, testing, and commissioning. By the end, you’ll have a clear roadmap to confidently build high-pressure piping systems that meet the highest safety and performance standards.

Step-by-Step Guide to High-Pressure Pipe Fabrication

Fabricating piping for high-pressure applications is a multi-stage process that requires precision, adherence to standards, and rigorous quality control at every stage. Rushing or skipping steps is not an option. Here are the core stages involved:

Black and white view of an industrial pipe system in a manufacturing facility, showing multiple bolted flanges in a symmetrical layout.

Detailed Planning, Review, and Material Verification

Before any physical work begins, a thorough review of the design documents, specifications, and procedures is essential. This is where you ensure everyone involved understands the project’s requirements and constraints.

What to Do:

  • Review and cross-reference all relevant drawings (P&IDs, Isometrics, GAs) against the material specifications and design basis. 
  • Hold a pre-fabrication meeting with the engineering, fabrication, welding, and quality control teams to discuss the scope, critical joints, special requirements (such as heat treatment), and the inspection plan.
  • Verify that all required materials (pipes, fittings, flanges, etc.) have arrived on-site, match the specifications, and are accompanied by the necessary Mill Test Reports (MTRs) or Certificates of Compliance. 
  • Implement a material traceability system. Mark each piece of material with a unique identifier that links it back to its MTR. 
  • Confirm that all required WPS, PQR, and Welder Performance Qualifications (WPQs) are available, approved, and cover the specific materials and welding processes to be used.
  • Review the fabrication sequence and lifting plans, especially for large or complex spools.

Why it Matters:

This initial review phase is your opportunity to catch potential problems on paper before they become costly mistakes in the workshop. Verifying materials ensures that the system will have the properties required to withstand high pressure and temperature. Confirming procedures and qualifications ensures that critical welding work is performed by competent individuals using approved methods.

Accurate Cutting and Edge Preparation

Once materials are verified, they are cut to the required lengths according to the spool drawings. Just as critical as cutting is the preparation of the edges that will be joined, usually by welding.

What to Do:

  • Lay out the pipe lengths precisely according to the cutting list derived from the isometric drawings. Double-check measurements.
  • Use the appropriate cutting method based on the material and the required accuracy. For high-pressure piping, thermal cutting methods like plasma or oxy-acetylene may be used for rough cuts on certain materials. 
  • Most high-pressure butt welds require a specific bevel angle (often 30-37.5 degrees) to create a groove for welding. This is typically done using bevelling machines (manual or automated) or grinders. 
  • Ensure the bevel angle, root face (the slight flat edge at the bottom of the bevel), and root gap (the space between two pipes to be joined) are precise according to the WPS. 
  • Maintain material traceability by transferring heat numbers or unique identifiers from the cutoff piece to the new, smaller piece.

Why it Matters:

Accurate cutting ensures the spools fit together correctly during assembly and installation. Proper edge preparation is fundamental to achieving a sound, full-penetration weld. Incorrect bevel angles, root faces, or gaps can lead to weld defects such as lack of fusion, lack of penetration, or excessive distortion, all of which can compromise the strength and integrity needed for high-pressure containment.

Fit-Up and Alignment

Fit-up is the process of bringing pipe pieces, fittings, and flanges together in preparation for welding. Correct fit-up is crucial for maintaining dimensional accuracy and enabling high-quality welds.

What to Do:

  • Position pipe sections and components (such as fittings and flanges) according to the spool drawings. 
  • Align the components carefully, ensuring that the root gap and internal alignment are within the tolerances specified by the WPS and applicable codes. 
  • Use temporary attachments (tack welds or bridge tacks) to hold the components in place once aligned. 
  • Verify the overall dimensions and geometry of the assembled spool against the drawings before committing to the full weld. 
  • Clean the joint area thoroughly before welding, removing any grease, oil, paint, or rust from the surface.

Why it Matters:

Accurate fit-up is crucial for achieving the correct geometry of the pipe spool and ensuring it connects properly to adjacent sections during installation. More importantly, proper fit-up (especially alignment and root gap) directly influences the welder’s ability to achieve a high-quality root pass, which is the foundation of a strong weld in high-pressure applications.

The Critical Process of Welding

Welding is arguably the most critical step in high-pressure pipe fabrication. A defective weld can be a catastrophic failure point. This stage requires highly skilled personnel, strict adherence to procedures, and careful control of welding parameters.

What to Do:

  • Ensure the qualified welder is using the correct Welding Procedure Specification (WPS) for the specific material and joint type.
  • Apply preheating if required by the WPS, using calibrated heating equipment (e.g., heating pads, induction heaters). 
  • Perform the root pass using the specified welding process (e.g., GTAW/TIG is often preferred for root passes in high-pressure piping due to its control and ability to produce high-quality, clean welds). 
  • Clean the root pass thoroughly before depositing subsequent weld layers (fill passes and cap pass). 
  • The deposit filler passes the specified welding process and filler material requirements. Follow the specified interpass temperature as per the WPS.
  • Complete the weld with a cap pass, ensuring proper tie-in to the bevel edges and sufficient reinforcement (weld crown height) as specified by the code and the Welding Procedure Specification (WPS).
  • Apply post-weld heat treatment (PWHT) as required by the code, material, or welding procedure specification (WPS). 
  • Visually inspect the completed weld immediately after it cools (or after PWHT if applicable) for surface defects such as cracks, porosity, undercut, or insufficient reinforcement.

Why it Matters:

Welding joins the components together to create a continuous pressure boundary. High-pressure systems subject welds to immense stress. Any defect within the weld or the adjacent heat-affected zone can act as a stress concentration point, leading to crack initiation and potentially catastrophic failure under operating conditions.

Rigorous Inspection and Non-Destructive Testing (NDT)

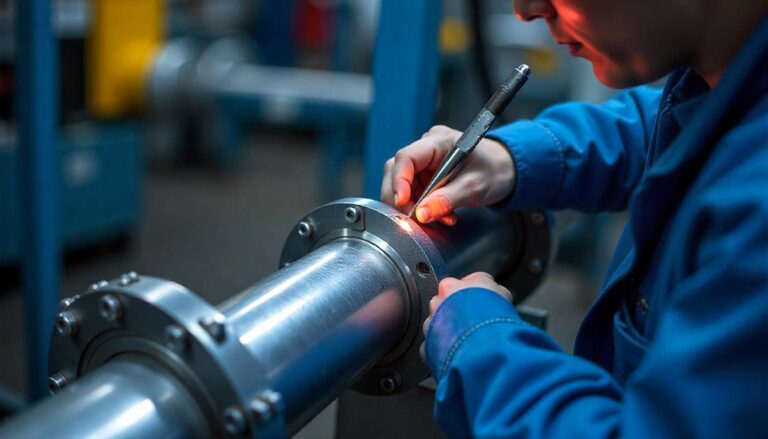
Once welding is complete, the fabricated spool must undergo thorough inspection and testing to verify its integrity. For high-pressure systems, this goes beyond visual checks.

What to Do:

  • Perform a detailed visual inspection of all welds. Check for surface imperfections, profile issues, and signs of cracking.
  • Conduct dimensional checks on the completed spool to ensure it matches the drawings, including length, flange face-to-face dimensions, nozzle and branch locations, and alignment.
  • Apply Non-Destructive Testing (NDT) methods as required by the code, work procedure specification (WPS), or quality control (QC) plan. Standard NDT methods for high-pressure welds include:
  1. Radiography Testing (RT)
  2. Ultrasonic Testing (UT)
  3. Magnetic Particle Testing (MT) or Liquid Penetrant Testing (PT)

Why it Matters:

NDT methods allow inspectors to “see” inside the weld or examine the surface for defects that are not visible externally. Finding and repairing defects during fabrication is significantly cheaper and safer than dealing with a leak or failure after the system is operational.

Pressure Testing (Hydrostatic or Pneumatic)

The final, definitive test of the fabricated spool’s ability to withstand pressure is the hydrostatic or pneumatic test. This is a critical safety measure that must be performed before the system goes into service.

What to Do:

  • Prepare the spool for testing. This involves temporarily capping off open ends, installing test blinds on flanges, and adding vents and pressure gauge connections. 
  • Fill the spool with the test medium. For hydrostatic testing, this is typically water. Ensure the system is filled, and all air is vented. 
  • Slowly increase the pressure in the spool to the required test pressure, as specified by the code (e.g., 1.5 times the design pressure for ASME B31.3 hydrostatic test, adjusted for temperature).
  • Hold the test pressure for the specified duration (e.g., typically 10 minutes for visible leak checks, but this duration may be longer).
  • During the hold time, visually inspect the spool, paying close attention to welds, flanges, fittings, and any other connections to check for leaks. 
  • After the hold time, slowly depressurize the spool.
  • Thoroughly drain and dry the spool after hydrostatic testing to prevent internal corrosion, especially if the material is susceptible to it.
  • Document the test pressure, hold time, test medium temperature, and result (pass/fail) in a pressure test report (pressure piping documentation).

Why it Matters:

The pressure test is a final, overall check of the entire fabricated spool’s integrity, including all welds, joints, and components. It simulates stresses exceeding normal operating conditions to prove the system can safely contain the design pressure. Successfully passing a pressure test is a mandatory requirement before a high-pressure system can be put into service.

Surface Treatment and Preservation

After successful pressure testing, the spool may require surface treatment, such as painting or coating, for corrosion protection, identification, or aesthetic reasons.

What to Do:

  • Clean the external surface of the spool thoroughly to remove any grease, oil, rust, or welding spatter. Surface preparation methods (like sandblasting) must be appropriate for the material and the intended coating system.
  • Apply the specified coating system (e.g., primer and topcoat) according to the manufacturer’s instructions and project specifications. 
  • Mark the spool with its unique identification number, service designation, flow direction, and any other required information as per project standards. 
  • Apply internal preservation if the spool will be stored for an extended period before installation, especially for materials susceptible to internal corrosion. 
  • Protect flanged faces and bevelled ends with covers or protectors to prevent damage during handling, storage, and transportation.

Why it Matters:

Surface treatment protects the external surface of the pipe from corrosion and environmental degradation, extending the lifespan of the system. Proper marking ensures correct identification and orientation during installation, preventing costly errors. Preservation protects the internal surfaces from corrosion before the system is commissioned and filled with the process medium.

Documentation and Handover

The final, crucial step in the fabrication process is the compilation of all documentation and the formal handover of the completed spools.

What to Do:

  • Compile the Manufacturer’s Data Record (MDR) or Fabrication Dossier. 
  • Ensure all documentation is complete, accurate, signed, and reviewed by the quality control team. 
  • Package the fabricated spools appropriately for transportation, ensuring protection of vulnerable areas (like flange faces).
  • Formally hand over the fabricated spools and the complete documentation package to the client or the site construction team.

Why it Matters:

The documentation package provides a comprehensive history of the fabrication process, verifying that all requirements were met and demonstrating the system’s integrity. This dossier is essential for regulatory compliance, future maintenance, modifications, and troubleshooting. It serves as the birth certificate for the high-pressure system.

Technician marking a metal pipe flange for welding in an industrial fabrication workshop.

Conclusion

Fabricating high-pressure piping systems is a complex undertaking that demands meticulous planning, skilled execution, and unwavering commitment to quality and safety standards. It’s a process where the most minor oversight can have significant consequences, making attention to detail not just good practice, but an absolute necessity.

Building systems you can trust requires following these steps diligently, prioritizing safety above all else, and maintaining a sharp focus on quality at every stage. While challenges may arise, a structured approach and a commitment to best practices will guide you toward successful fabrication.

Begin your initial assessment and planning today and take the first step towards securing your facility’s high-pressure piping systems.

Need expert assistance in navigating the complexities of high-pressure pipe fabrication, ensuring compliance, or executing a critical project? Discover SRJ Piping India’s solutions next.

Need Expert Help With High-Pressure Pipe Fabrication?

Let SRJ Piping India guide you with proven techniques, certified welders, and cost-effective fabrication strategies that ensure safety and compliance—every time.